Learning to preserve – Making Sauerkraut.

Hopefully my gardening efforts will produce a surplus of produce. Probably not this year when the only space I have to grow is three windowsills, but in the future when I have more space. Combining this with my love of traditional skills and learning how to preserve food seems like an obvious step forward. I can already make a fairly decent jam (I made a few jars in autumn with some blackberries I gathered from a nearby park), I have no experience however, with fermenting food. I really enjoy the taste of sauerkraut and my veg box this week contained a cabbage, so it seemed like a good place to start.

I found a recipe online that used both cabbage and leeks, which were also in this weeks veg box. It also used a coconut oil seal and a regular Kilner jar, so no need for expensive equipment I may never use again.

I chopped up the cabbage and leek into small pieces, added salt and mashed with the end of a wooden rolling pin until the juices started to release from the veg. I let it sit for a few hours before putting into the jar and mashed again, pressing the veg down until it was completely submerged in the brine – apparently this is important so that mould doesn’t form. Then I added a layer of coconut oil which solidified to form a seal (hopefully meaning harmful bacteria can’t get it) and loosely closed the lid. It seems to be working so far – I hope it goes well and I haven’t wasted all that veg for nothing!

I can’t wait until it’s autumn and I can go blackberry collecting again – I might try making blackberry wine as well as jam this year!

What do you preserve and how do you do it? If you have and tips or ideas for a complete beginner, let me know!

It wasn’t me, it was the seeds, I promise!

One of the very first things I planted back in January was Lambs Lettuce. I’m not a massive fan but my tortoise loves it and it seemed like it shouldn’t be all that difficult to grow. So I planted it an waited. Nothing happened. I assumed it was due to my planting in January not in February as the packet had suggested. So at the start of February I planted the remaining seeds using every method I could think of. Some went straight into soil, some got soaked first, some were in a propagator. Still nothing happened. I was starting to doubt my own gardening skills, there was no way in an entire packet of seeds not a single one could germinate.

After my failure with the first packet, I had pretty much given up on Lambs Lettuce, the Kale was growing and the tortoise likes that too. As a result I barely put any thought into sowing my second packet of seeds, I just sprinkled them onto some soil and left them, watering occasionally. However less that a week later my tray is full of tiny Lambs Lettuce seedlings.

So it was the seeds that were rubbish all along, not my gardening skills!

Yay for fast growers!

In my last post I talked out how my mould issue in my soil had gotten so bad that I had ended up having to bin all my plants, which was super sad! Not only did it mean that I had none of the tasty food I was expecting, but also my flat looked so dull without all the greenery. I happy to say though that after just over a week I already have shoots of several different edible plants visible and growing rapidly. These quick growers have brought life back to my flat and mean that I won’t be without home grown additions to my meals for long!

The most successful fast growers so far have been kale, spinach, pea shoots and cress. These are all fun little plants that can be sown pretty much all year round on a sunny windowsill. I’m looking forward to all the delicious salads I will be able to make from them in just a few weeks time, and the tortoise is no doubt looking forward to having some freshly picked greens added to her diet too!

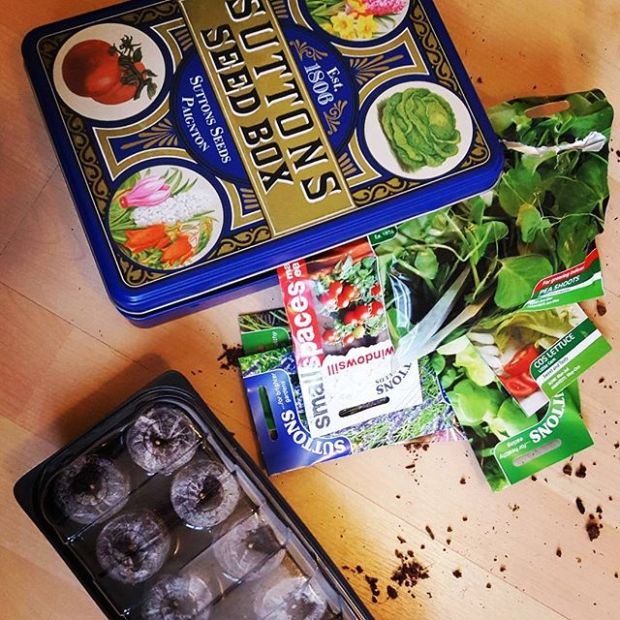
Only a few more weeks until march now, and the start of the real planting season! My seed box is overflowing with little packets just waiting to be opened. I’m currently most looking forward to planting tomatoes, rainbow carrots and for something a bit different; a stevia plant to make my own sweetener!

What are your favourite fast growing edibles? Let me know in the comments and give me some inspiration for what to plant next!

A small disaster and a big re-focus

Earlier this week I mentioned I had a problem with mould growing on my soil. I thought I had combatted the issue by removing the affected plants, increasing air circulation and not over watering. However, the mould later spread to over half of my remaining plants, and I felt that I had no choice but to get rid of the lot and allow my flat to air out for a few days. This is really sad for me and something I really didn’t want to have to do, but sometimes you have to make a hard choice to benefit in the long run. We are still only in February which means I have plenty of time to re grow without any detrimental effects to my harvests later in the year. Better to have to start over now than in April or May.

Always trying to find the good in a rubbish situation, I have decided to take this time to re-focus my gardening efforts. When I started in January my aim was pretty much ‘grow things’…However as I have learnt more I have wanted a more focused plan. In the long term when I have a house with a garden I would like as much of my food as possible, but that just isn’t realistic right now. I’m also not necessarily growing to look pretty – partly because I personally think almost all plants look pretty aesthetic, but also because I still do want something to eat out of all this effort. I like food. Therefore I have decided to combine my love of gardening, history and all things weird to grow unusual and historic/heirloom varieties! I’ve ordered a few seeds that fit this description and they will hopefully arrive very soon! I’m looking forward to a more focused and intentional approach to my garden planning. Also I get to grow weird looking things that I can then give to people as gifts…

Also if none of this post makes sense it’s because I have a cold and have spent all day applying for jobs. My brain has turned kind of mushy…also if anyone works in a museum and wants to give me a job, that would be totally fine, I have a relevant masters and a few years experience 😉


Pea Shoots – The easiest thing you will ever grow…

Pea shoots are delicious, good for you, and if you buy them in the supermarket very expensive. In fact Sainsbury’s is currently selling them for £1 for a 50g bag. The good news, however, is that they are one of the easiest things to grow at home indoors and can also be grown all year around for a very low cost – regular dried peas work just as well as ‘pea shoot’ seeds from the garden centre and are much more economical.

What are shoots?

Shoots are a kind of edible garden mid-point. They fall right between sprouting and growing a full plant, and are therefore a fun and versatile project that also works well with children (or adults with short attention spans, like myself). To grow a crop of pea (or other) shoots, simply plant the pea seeds in a pot, cover with a layer of soil and water. After a few days the peas will start to sprout and once they have a number of leaves and are about 7-10 cm tall, cut them back and enjoy in a yummy salad. This process can be repeated around 3 times before you need to plant new peas.

If you decide you want a full on, pea producing plant, just re-pot one of the shoots before you first cut it back and continue to let it grow!

From seed to edible shoots take about 3 weeks, making these a fun and fast growing crop.

What other shoots can I grow?

Shoots are small, and therefore perfect for indoor gardening – I am currently also growing Kale shoots and Chickpea shoots, although i’m sure this technique would work for growing many other plants.

If you’re interested in growing pea shoots and are based in the UK, you can buy seeds from me directly here !

I have a garden problem – Indoor Mould

A handful of my pots have developed a small problem with mould on the surface of the soil. Luckily it is only a minority but those affected have been quarantined on the kitchen windowsill, safely away from the unaffected in the living room. Hopefully this will stop the spread of the mould and prevent any further problems.

I think I know what has caused this problem and that is over-watering and a lack of bright sunlight. I recently changed the compost I was using and they new variety is much better at holding water. However I did not adapt to this and kept on with my previous daily watering schedule, whereas the new compost only needs every other day watering. This is an easy mistake to fix however and hopefully I will not have caused any long term damage. The lack of sunlight I unfortunately have much less control over, and with in being early February sunlight is in short supply. Hopefully this will become less of an issue as the days get longer and warmer. One of the best secondary advantages of my indoor garden so far is that I seem to notice the changes in seasons much more than before. Living in a flat in a large city can sometimes cause a disconnect from the natural world, and my indoor garden has so far been a great remedy for that!


Growing new food from old food

Did you know you can grow new plants from kitchen scraps you regularly throw away? I mean, you’re probably vaguely aware of the concept, but have you ever actually tried it? I hadn’t until recently and it’s been the biggest surprise so for. IT’S JUST SO EASY!

The idea really appeals to me since it is helping to cut down on food waste, therefore being good environmentally, but is also free, which my student budget definitely agrees with. Seeds are expensive sometimes…

I’m currently growing the following from scraps on my windowsill:
Onion
Garlic
Carrot
Parsnip

I’m also growing chickpeas and black beans, which while not from scraps, are growing from supermarket bought dried beans I had in my cupboard anyway.

I could write out instructions for growing from scraps, but instead I’ll link you to this lovely video from Buzzfeed, which tells you everything you need to know.


If you’re already growing from kitchen scraps, leave me a comment and tell me what you’re growing – I could always use some more ideas for plants…

What am I growing?

As my garden is very new, I am still in the planting and seedling stage for many things. Therefore many of the photographs you will see will just be of seeds or teeny tiny plants that are hard to recognise at first (in fact, you might notice many of the pots have the name of the plant written on them, so I don’t get confused…).

I have decided to put together this month-by-month list of all my planting, so you can see what I am attempting to grow.

Planted in January: Alpine Strawberries, Sage.

Planted in February: Lavender, Lambs Lettuce, Cress, Pea Shoots, Kale, Chickpea Shoots, Onion scraps, garlic bulbs, Carrot tops, black beans, Parsnip Tops.

To be planted in March: Pak Choi, Basil, Tomato, Cos Lettuce, Spinach.

To be planted in April: Mixed Leaf Salad, Carrot

I’m sure more will be added to this list as I find more growing spaces…I’m thinking the bathroom windowsill next? Although that doesn’t get much light…
Potential future plantings include beetroot, radish and peas. Although I shouldn’t get too ambitious in my first year. 16123837_1206677666036904_5755356764774072320_n


Why would anyone want an indoor vegetable garden?

I really like plants. I have always lived in houses with lots of growing things and everyone in my family has beautiful gardens. When I first moved in on my own, being a postgraduate student, I couldn’t afford a house with a garden – I live in a studio flat with absolutely no outdoor space – not even a communal garden or yard. I really wanted something to make my space feel more lively and so I started off with a few cacti and my plant collection grew from there.

I also really enjoy cooking and eating, and am very environmentally conscious. Therefore, growing my own food, to whatever extent I could, seemed like the perfect combination of all of these interests. I started planting seeds and slowly became more and more ambitious in what I was attempting to grow. These foods are not only fun to grow, but I also know exactly where they have come from, what has happened to them during their lives and best of all, they have almost zero food miles.

When I started attempting to grow my own food indoors, I searched for blogs and websites that could show me what was possible and give me ideas. Unfortunately I found very little, mostly I found people using expensive and energy using grow-light systems or complex hydroponics. I wasn’t interested in either of these growing methods and so I decided to set up my own site, so that hopefully others can not only benefit from my ideas, but also learn from my mistakes.